
However, misinformation online and in consumer-oriented
magazines can be so bad I simply must set the record straight for everybody. Being
educated in an industry which you patronize is your best line of defense
against fraud and malpractice. I find myself quite privileged to know as much
as I do about the industry and often feel the need to pass the right
information along any time I can see that wrong information or practices could
do serious harm to an uninformed consumer.
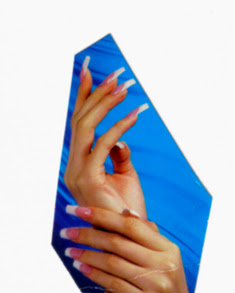
The diagram underneath came straight off
the internet with an eye to give inside information to consumers. It is so
erroneous that I am going to point out every single error in hopes that it will
clear up confusion for patrons and may also inform new techs who are still in
the process of learning- even with a license and diploma in hand. Those techs
should not feel they are being shamed. As with any profession, learning is an
ongoing process which never ends, fueled by experience and sometimes by
trial-and-error.

Four of
the nine tags on this diagram detail of the tip of the finger are wrong. First,
a quick rundown on the errors:
The label for hangnails located on the left of the photo in white letters should
be labeled skin tags. This is simply
torn skin above the nail cuticle line and usually occurs from handling
paper. Paper sometimes makes very small cuts into dry skin which may eventually
start to tear further back. Using cuticle oil liberally and often may stop
further tearing, depending on how much you have to deal with paper. Wearing
rubber fingers on your nail tips may prevent tags if you must work with paper.
These can be cut expertly by well-experienced manicurists.
The Sidewall Hangnail is just simply an
actual hangnail also technically referred to as an agnail. Hangnails are
serious tear-aways of tissue which cushions the nail groove along either side
of the nail. Sometimes you may experience bleeding along with them. If you pull
at them they definitely will bleed because it causes this important fold of
skin to pull out live tissue from underneath the nail plate creating a split in
the nail and usually resulting in an infection. Bleeding hangnails require first-aid
before any work can be done on them and should not be manicured until the area
is scabbed and free of infection.
The hangnail depicted is not infected and
can be cut and smoothed without invading the epithelial tissue underneath by a
licensed manicurist. If bleeding should occur after the incision, it must be treated
with antiseptic, stanched and covered with a small cotton pledget and then bandaged.
The Lunula is simply a white, moon shaped
appearance at the base of the nail where it grows out. It appears on
fast-growing nails and is usually most often seen on children and young
people’s hands. This is an area where the nail is still in the process of
hardening as it grows out and appears white due to the reflection of light
where the matrix and the connective tissue of the nail-bed join. It is not on
top of the nail but is a part of it. Manicurists should not put excessive pressure
on the nail at that area as it is too soft for such pressure and will damage
it. For this very reason I am extremely careful about what I do on young fingernails!
The dry and cracked-looking area tagged
Proximal Nail Fold of the Eponychium is, in fact, the actual cuticle line and
the entire area that surrounds the nail border is technically referred to as Perionychium. The spot depicted as Cuticle is a condition called pterygium and
the photo above is actually showing the effects of a botched manicure on the
problem, hence the dry and cracked area which has actually been mutilated. The
excessive forward growth shown is typical of the condition and fiercely adheres
to the nail plate. Pterygium may either break away from the nail fold or it may stay
attached in rare and tough cases. In the past, cuticle nippers were used
to cut away the growth from the cuticle line. Because this is rarely successful
and may be hazardous, a better solution is to always do hot oil manicures on
people with this condition and use pushers with no abrasiveness or hardness.
Rubber tipped pushers for pterygium are ideal. People with pterygium should use
cuticle oil as often as they brush their teeth and make a conscientious effort
to gently push back their cuticles with a towel after hand-washing or bathing.
In any case, keeping that cuticle as soft and pliable as possible is the goal.
Pterygium is a rare condition.
Lastly, the two labels Distal Edge of Nail
Plate and Free Edge are exactly the same thing and are obvious.
I hope this information was helpful to
you. If you have any comments or questions on the material covered on this
entry please leave it in the comments. Your information will be kept
confidential.

No comments:
Post a Comment